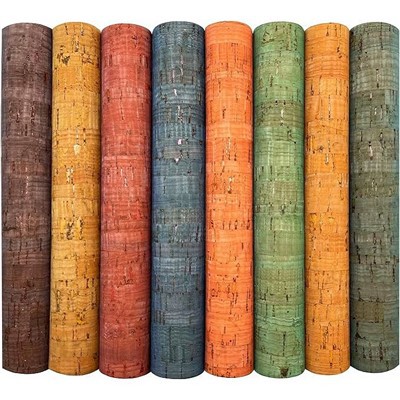
Hey there, craft enthusiasts! Today, I'm stoked to share with you a step-by-step guide on how to make a glitter fabric cape. As a glitter fabric supplier, I've seen firsthand how these sparkly materials can transform a simple project into something truly magical. Whether you're making a cape for a costume, a special event, or just for fun, this guide will walk you through the process from start to finish.
Materials You'll Need
Before we dive into the process, let's gather all the materials you'll need:
- Glitter fabric: You can choose from a variety of glitter fabrics depending on your preference. We have a wide range of options available at China Manufacture Metallic Fabric Leopard Print Fabric Very High - grade Suede Fabric Suitable for Bags, Shoes,cloth and Sofa. This fabric comes in different colors, patterns, and textures, so you're sure to find the perfect one for your cape.
- Measuring tape
- Scissors
- Sewing machine or needle and thread
- Elastic or ribbon (for the neck closure)
- Optional: Decorative elements like sequins, beads, or lace
Step 1: Measure and Cut the Fabric
The first step is to measure and cut the glitter fabric to the desired size of your cape. The size of the cape will depend on who it's for and how long you want it to be. For an adult cape, a good starting point is to measure about 40 - 60 inches in width and 40 - 50 inches in length. For a child's cape, you can adjust the measurements accordingly.
Lay the glitter fabric out on a flat surface and use the measuring tape to mark the dimensions. Then, carefully cut along the marked lines using the scissors. Make sure to cut straight and smooth edges for a professional look.
Step 2: Create the Shape of the Cape
Once you have the fabric cut to the right size, it's time to create the shape of the cape. There are a few different ways to do this, but a simple and classic shape is a semi - circle.
Fold the fabric in half lengthwise, with the glittery side facing in. Then, starting at the folded edge, draw a semi - circular arc from one corner of the fabric to the other. You can use a large plate or a bowl as a guide to draw a perfect curve. After drawing the arc, cut along the line with the scissors.
Step 3: Finish the Edges
To prevent the glitter fabric from fraying, you'll need to finish the edges. You can do this in a few ways. If you have a sewing machine, you can use a zigzag stitch along the edges of the cape. This will not only prevent fraying but also give the cape a nice, finished look.
If you don't have a sewing machine, you can use a needle and thread to do a simple overcast stitch. Just thread the needle, and start stitching along the edge of the fabric, catching the edge with each stitch. It might take a little longer than using a sewing machine, but it's a great alternative.
Step 4: Add the Neck Closure
Now it's time to add the neck closure to the cape. You can use elastic or ribbon for this. If you're using elastic, cut a piece of elastic that is about 12 - 14 inches long for an adult cape. For a child's cape, you can cut it a bit shorter.
Fold the top edge of the cape over about 1 inch to create a casing for the elastic. Pin the folded edge in place, and then sew along the edge, leaving a small opening at one end to thread the elastic through. Use a safety pin or a bodkin to thread the elastic through the casing. Once the elastic is through, sew the opening closed.
If you're using ribbon, you can simply cut two pieces of ribbon that are about 18 - 20 inches long. Attach the ribbon to the top corners of the cape using a few stitches. You can tie the ribbon around the neck to secure the cape.
Step 5: Decorate Your Cape (Optional)
This is the fun part! You can add some extra sparkle and personality to your cape by decorating it with sequins, beads, or lace. You can sew the sequins and beads onto the cape using a needle and thread. For lace, you can attach it to the edges of the cape using a sewing machine or glue.
If you're feeling really creative, you can also use fabric paint to add some designs or words to your cape. Just make sure to use fabric - specific paint so that it doesn't wash off.
Tips and Tricks
- When cutting the glitter fabric, be careful not to let the glitter get all over the place. You can use a piece of paper or a plastic sheet under the fabric to catch the glitter.
- If you're using a sewing machine, make sure to use a sharp needle. Glitter fabric can be a bit thick, and a dull needle might cause the fabric to bunch up or the stitches to break.
- When adding decorative elements, start with a small area first to see how it looks. You can always add more later if you want.
More Glitter Fabric Options
If you're looking for other types of glitter fabric, we also offer Glitter Vinyl Leather Faux Synthetic Leather Fabric Sheets for Hair Bow Bags Shoes Crafts Material Fast Shipping and Wholesale Glitter Metallic Fabric Glitter Mirror Leather Manufacture For Shoes Bags DIY Crafts. These fabrics are perfect for different types of projects, not just capes.


Contact Us for Your Glitter Fabric Needs
If you're interested in purchasing glitter fabric for your next project, we'd love to hear from you. We offer high - quality glitter fabrics at competitive prices, and we can help you find the perfect fabric for your needs. Whether you're a professional crafter or just starting out, we've got you covered. Reach out to us to discuss your requirements, and let's create something amazing together!
References
- Crafting magazines and online tutorials on DIY capes
- Personal experience as a glitter fabric supplier