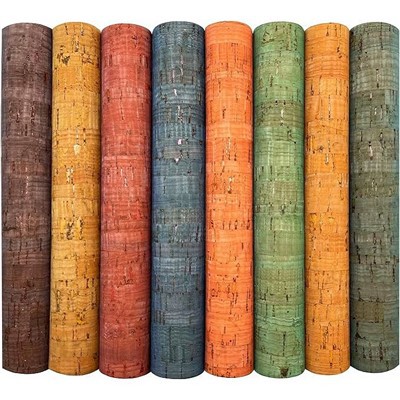
Hey there! I'm a supplier of printed cork fabric, and I know how frustrating it can be when your beautiful printed cork fabric gets torn. But don't worry, I'm here to walk you through the process of repairing a torn printed cork fabric.
Understanding Printed Cork Fabric
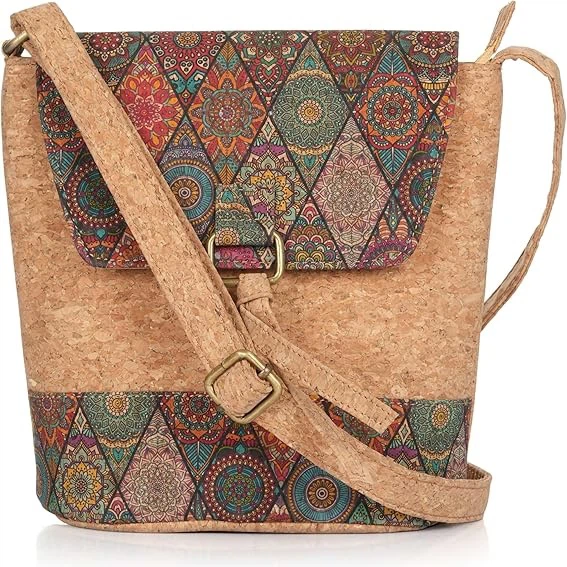
Before we dive into the repair process, let's quickly talk about what printed cork fabric is. Printed cork fabric is a unique and eco - friendly material made from the bark of cork oak trees. It's known for its durability, flexibility, and of course, its ability to be printed with all sorts of cool designs. We're proud to be a Printed Cork Fabric China Manufacture Cork Leather Supplier for Footwear Handbags Hat Laptop Automotive Interiors Furniture, offering high - quality printed cork fabric for a wide range of applications.

Assessing the Damage
The first step in repairing a torn printed cork fabric is to assess the damage. Is it a small tear, a large rip, or a hole? Small tears are usually easier to fix compared to larger ones.
- Small Tears: These are tears that are less than an inch long. They might be the result of a sharp object gently grazing the fabric.
- Large Rips: Rips that are more than an inch long can be a bit more challenging to repair, but it's still doable.
- Holes: Holes can be caused by something puncturing the fabric. The size and shape of the hole will also affect the repair method.
Gathering Your Tools
Once you've assessed the damage, it's time to gather the tools you'll need for the repair. Here's a list:
- Cork Adhesive: You'll need a good quality adhesive specifically designed for cork. Make sure it's strong enough to hold the fabric together but also flexible so it doesn't crack as the fabric moves.
- Scissors: Sharp scissors will be used to trim any loose or frayed edges.
- Fine - Tipped Brush: This will come in handy for applying the adhesive precisely.
- Sandpaper (Optional): If the edges of the tear are rough, you can use fine - grit sandpaper to smooth them out.
- Clamps or Weights (Optional): These can be used to hold the fabric in place while the adhesive dries.
Repairing Small Tears
If you're dealing with a small tear, here's how you can fix it:
- Clean the Area: Use a clean, dry cloth to wipe away any dust or debris from the torn area. This will ensure that the adhesive bonds properly.
- Trim the Edges: Use your scissors to carefully trim any loose or frayed threads along the tear. Make sure the edges are clean and straight.
- Apply the Adhesive: Dip the fine - tipped brush into the cork adhesive and apply a thin layer along one side of the tear. Be careful not to use too much adhesive, as it can seep through and leave a messy look.
- Press the Edges Together: Gently press the two sides of the tear together, aligning them as best as you can. Hold them in place for a few seconds to let the adhesive start to bond.
- Let it Dry: Leave the fabric undisturbed for at least 24 hours to allow the adhesive to fully dry and set. If you want, you can use a clamp or a small weight to hold the edges together while it dries.
Repairing Large Rips
Repairing large rips requires a bit more effort, but it's still within reach:
- Prepare the Edges: Just like with small tears, clean the area and trim any loose threads. If the edges are rough, you can use fine - grit sandpaper to smooth them out gently.
- Cut a Patch: If the rip is large, you might need to cut a patch from a spare piece of the same printed cork fabric. Make sure the patch is slightly larger than the rip.
- Apply Adhesive to the Patch and the Rip: Use the fine - tipped brush to apply a thin layer of adhesive to the back of the patch and along the edges of the rip.
- Place the Patch: Carefully place the patch over the rip, aligning the pattern as closely as possible. Press it down firmly, starting from the center and working your way out to remove any air bubbles.
- Secure and Dry: Use clamps or weights to hold the patch in place. Let the fabric dry for at least 48 hours to ensure a strong bond.
Repairing Holes
Holes are a bit different, but the general process is similar:
- Clean and Trim: Clean the area around the hole and trim any loose fibers.
- Cut a Plug or Patch: Depending on the size of the hole, you can either cut a small plug (for a small hole) or a patch (for a larger hole) from a spare piece of cork fabric.
- Apply Adhesive: Apply adhesive to the edges of the hole and the plug or patch.
- Insert the Plug or Place the Patch: If using a plug, insert it into the hole and press it down gently. If using a patch, place it over the hole and press firmly.
- Finish and Dry: Use weights or clamps to hold the repair in place and let it dry for 24 - 48 hours.
Finishing Touches
Once the adhesive has fully dried, you can give the repaired area a final inspection. If there are any excess adhesive or rough edges, you can carefully trim them with your scissors. You can also use a soft cloth to buff the area gently to make it look more uniform with the rest of the fabric.
Preventing Future Damage
To avoid having to repair your printed cork fabric again, here are some tips:
- Handle with Care: Avoid sharp objects coming into contact with the fabric. When using it for items like handbags or footwear, be mindful of where you place them.
- Store Properly: If you're not using the fabric, store it in a cool, dry place away from direct sunlight.
- Regular Maintenance: Periodically clean the fabric with a mild cleaner to keep it in good condition.
Contact Us for Your Printed Cork Fabric Needs
If you're in the market for high - quality printed cork fabric, look no further! As a Printed Cork Fabric China Manufacture Cork Leather Supplier for Footwear Handbags Hat Laptop Automotive Interiors Furniture, we offer a wide range of designs and colors to suit your needs. Whether you're a small - scale crafter or a large - scale manufacturer, we've got you covered. Contact us today to start a procurement discussion and see how our printed cork fabric can take your products to the next level.
References
- Cork Fabric Handbook: A Guide to the Properties and Uses of Cork Fabric
- DIY Cork Fabric Repairs: Tips and Tricks from the Experts